
Is it hard to change brake pads and rotors? Changing brake pads is one of the easier jobs to do on a car and it’s something that many car owners do themselves. Personally I prefer changing the brake pads to changing the oil even though chaining the oil is considered one of the easiest things you can do on your car. Changing the rotors requires some more effort compared to changing only the brake pads but it’s not really any more difficult.
For someone considering changing brake pads or rotors for the first time I want to say don’t be afraid of changing your own brakes. I know it can be quite nerve wrecking to think if you mess something up you won’t have brakes to stop your car. But keep in mind that the brake systems on cars are actually pretty simple and it’s hard to mess up.
So I recommend anyone to try doing the job themselves since you will save a ton of money, learn something new and most of all you will feel proud you are able to fix your own car.
I also had some bad experiences with some car mechanics not actually doing what they were supposed to do. By doing it yourself you will know it gets done correctly and you will most likely spend a bit more time doing it properly. So if you later take your car to a mechanic you will also know what to check for in the sense of quality control.
In the below video I’m working on my Honda Jazz / Fit and removing the old brake rotors and pads. The same principles work on pretty much any car with disc brakes. So you can follow the video or the detailed instructions and illustrated guide below.
When do Brake Pads and Rotors need to be replaced
How do I know if my brake pads are worn out? Some brake pads for disc brakes come with a wear indicator which makes a squealing noise indicating you need to change the pads. If you don’t have wear indicators you can visually inspect the pads thickness which should be more than 1/8 inch (3 millimeters). When the brake pads are new they usually have around 3/8 inch (10 millimeters) thickness.
How do I know when my rotors need to be replaced? Brake rotors have a minimum thickness indicated by the manufacturer, so you can measure the rotor to check if the required thickness is no longer met. Deep grooves in the rotor discs or warping are also signs of the need for replacement.
As a rule of thumb, brake pads need to be changed every 30 000 miles (50 000 km) and brake rotors every 60 000 miles (100 000 km). This naturally varies based on driving style and the quality of the parts.
When replacing rotors you need to also install new brake pads. However, when changing the brake pads there is no need to change the rotor discs unless they are worn out.
How to Replace Brake Pads
How long does it take to replace brake pads? It depends on the car model, but as a rule of thumb, you can expect a mechanic to replace the brake pads in 30-60 minutes for one axle. If you are doing it yourself in your driveway you can expect to double this time. In my own experience, I have usually completed this in 1 to 2 hours. It kind of depends on how tight and rusty some of the parts are.
Required tools for changing brake pads
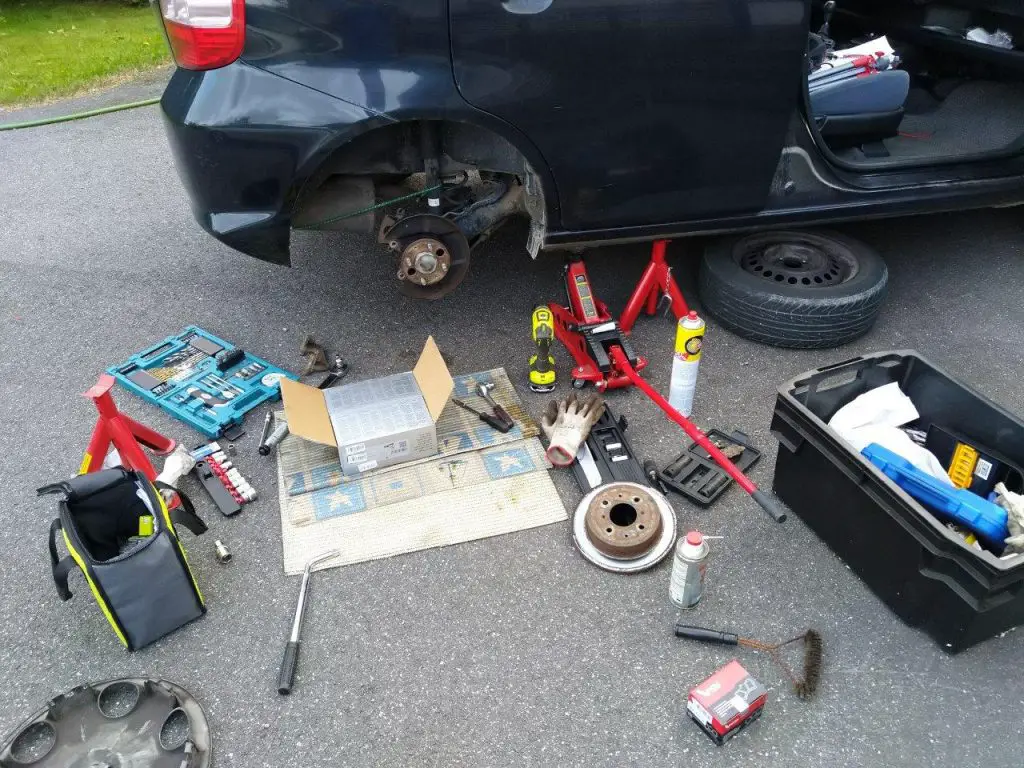
Start by purchasing the new brake pads and get all the tools out:
- New brake pads for your car model
- Work gloves
- Lug wrench (Telescoping lug wrench is my preference)
- Jack (Floor Jack is my preference)
- Jack stands
- Wheel chock (Piece of wood for example)
- Socket wrench
- Caliper compressor
- Copper anti-seize
- Silicone paste
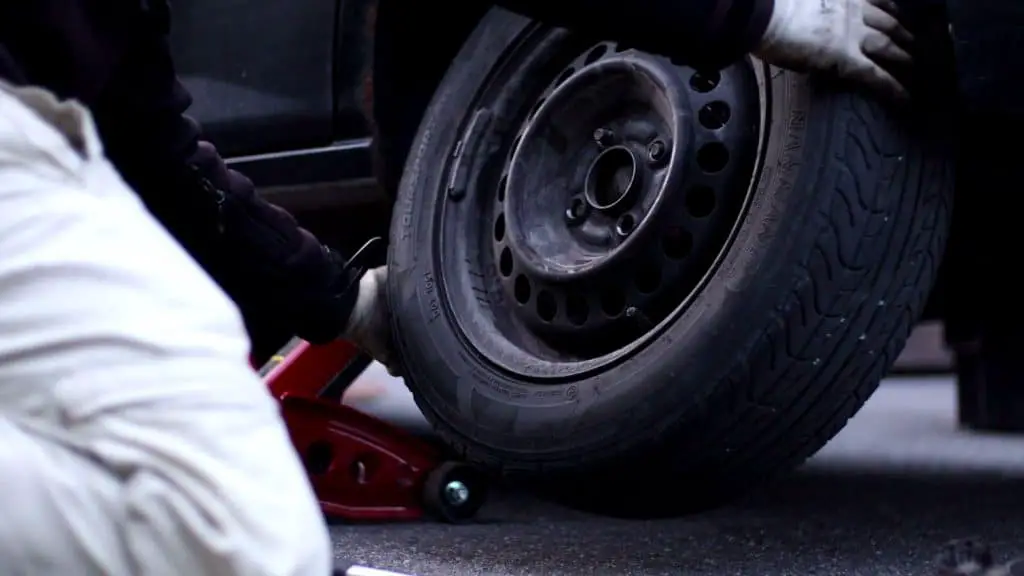
1. Lift the car up and place jack stand under the car
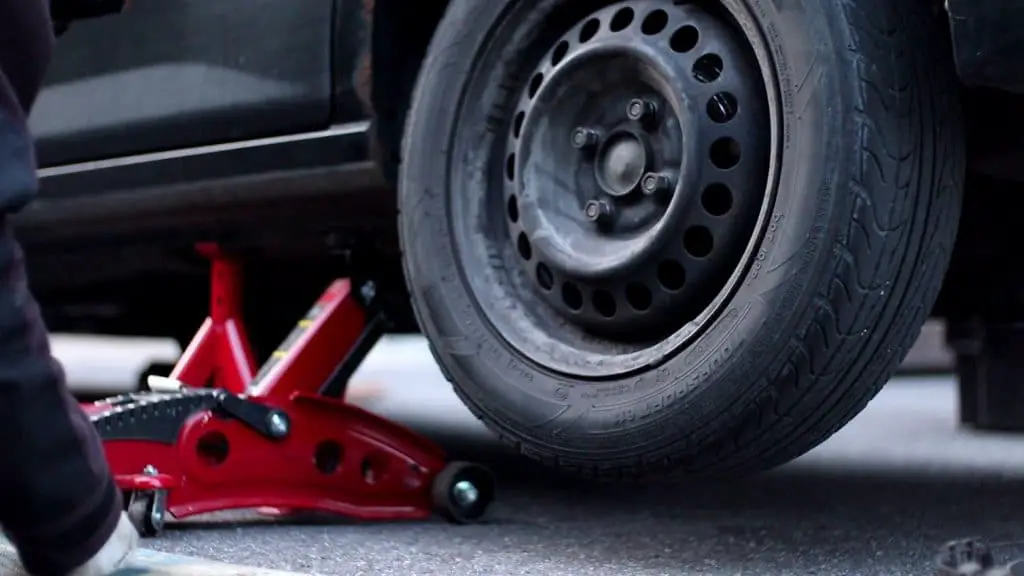
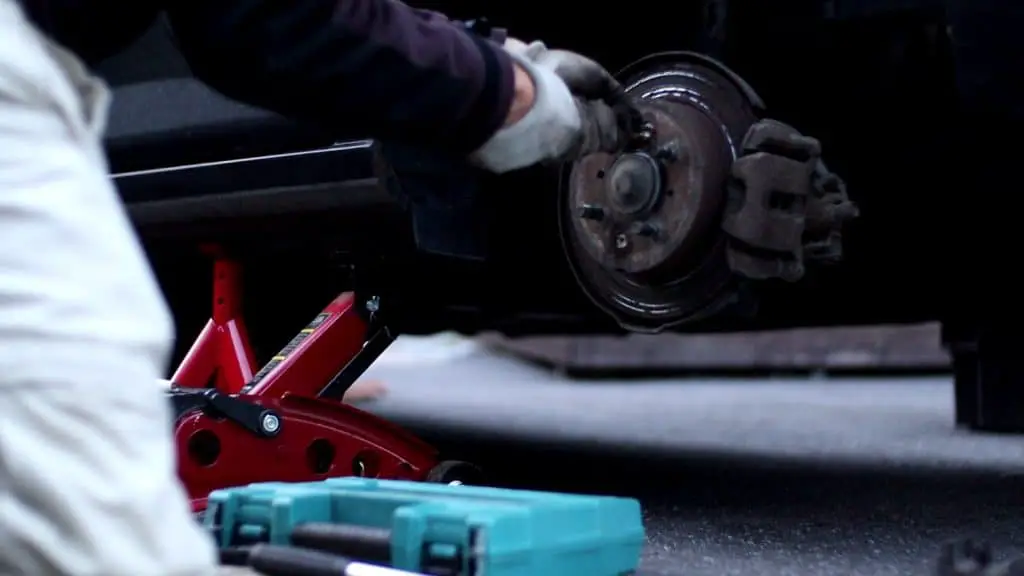
You will always need to replace brake pads from one axle at the same time. So lift up the end of the car you are replacing the brake pads for. You can go ahead and lift the whole end of the car in one go or just lift up one corner. In the above photo, I’m jacking up the left rear corner of my Honda Jazz.
You can refer to the car’s owners manual for safe places to jack up the car.
Use a wheel chock to prevent the car from rolling when jacking it up.
Use the lug wrench to loosen the lug nuts slightly on the wheels before jacking the car up, because otherwise, the wheel will just spin when you try to open the lug nuts.
You can use a floor jack to jack up the car and then place a jack stand under the car. Next, lower the car onto the jack stand. I usually raise the floor jack back to the spot firmly just to give some extra stability. Push the car with your hands to make sure it’s stable.
2. Remove the wheel
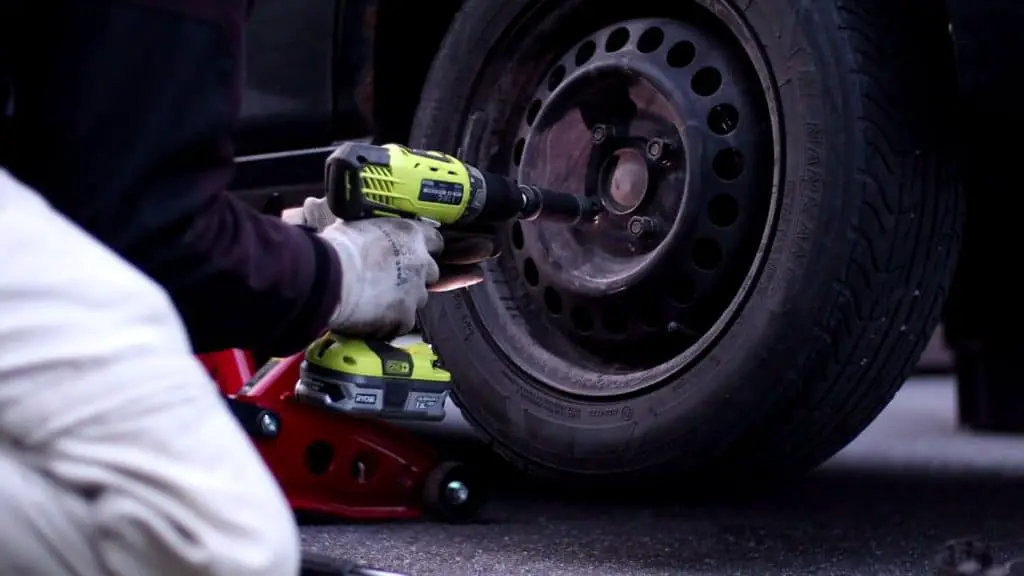
In the previous step, the lug nuts were already slightly loosened and the car was placed on jack stands. You can use a lug wrench to unscrew the lug nuts, but I personally prefer using my impact drill driver with a 1/2″ adapter for lug nut sockets to unscrew the lug nuts quickly.
After removing the lug nuts simply pull and lift the wheel off. As an extra fail-safe, I like to place the wheel under the car so that in the worst case of the car falling over it would land on the wheel and not go all the way down.
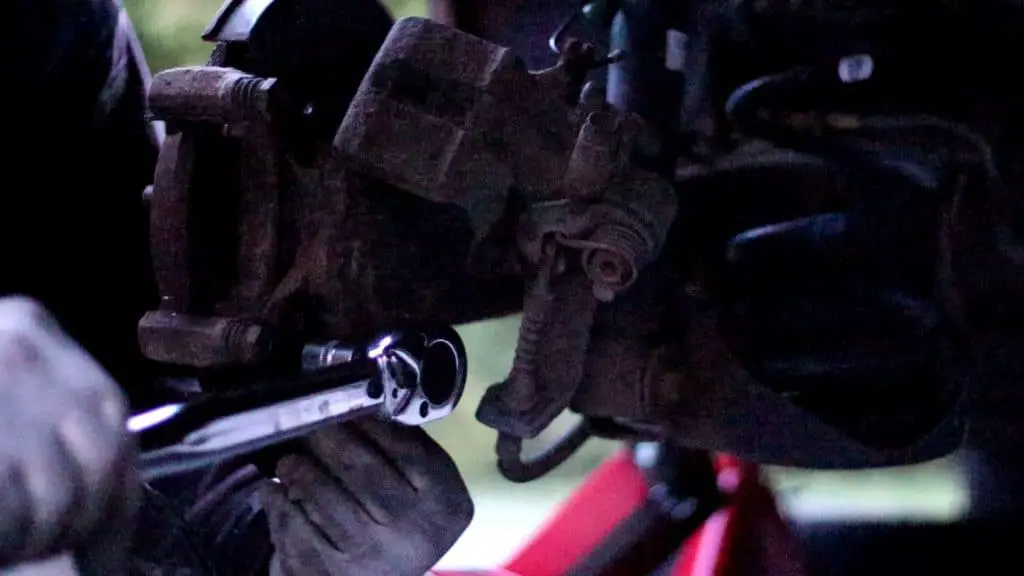
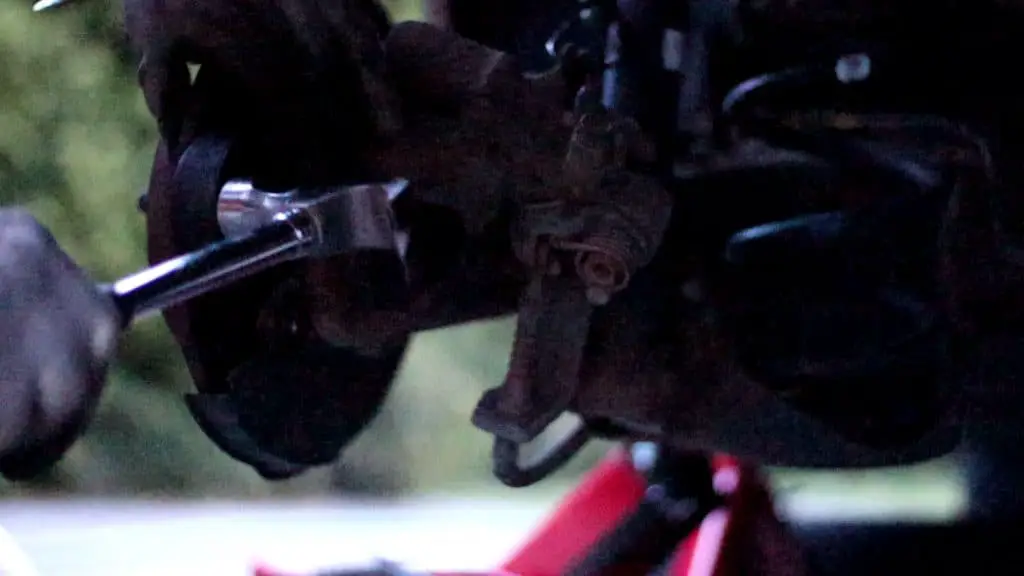
3. Remove the caliper
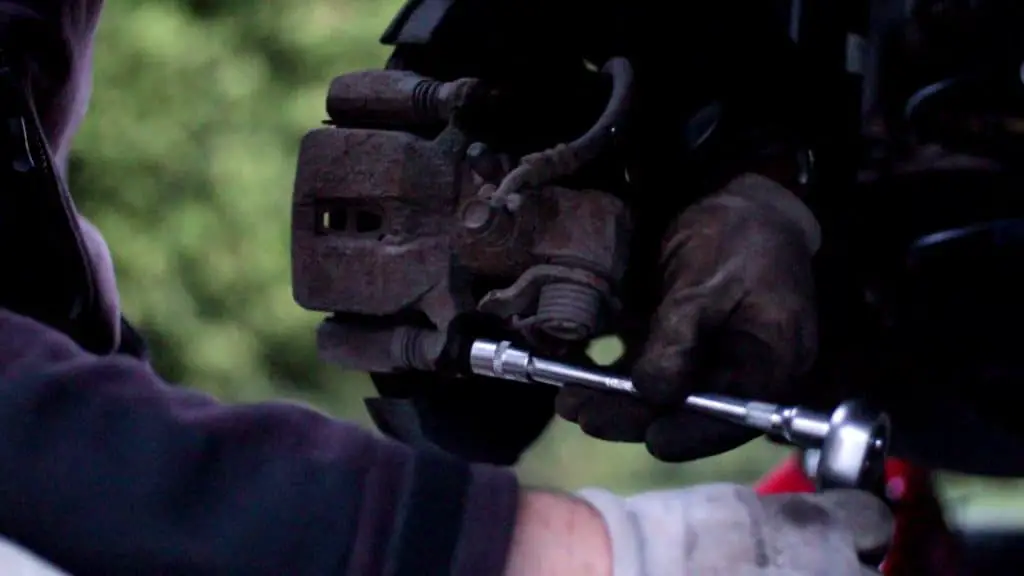
The brake caliper needs to be removed since the brake pads sit under the caliper. Usually, the brake caliper is held in place by two bolts which are threaded in from the backside of the caliper. You will need a socket wrench and most likely an extension on it as seen in the above photo.
Sometimes it’s sufficient to just remove the top bolt and swing the caliper out of place to remove and insert the new brake pads. I prefer removing both bolts since these are actually the caliper slide pin’s as shown in the below diagram. Removing the caliper pin’s gives you the chance to clean them and add some silicone paste on them. One common reason for the brakes sticking is having a caliper pin stuck and no longer sliding.
You don’t need to loosen the caliper bleed screw. Just put the caliper aside possibly hanging it on a wire and leave the brake hose in place. Be careful not to put tension on the brake hose. Leaving the brake hose on saves you from the hassle of bleeding the breaks.

4. Remove old brake pads
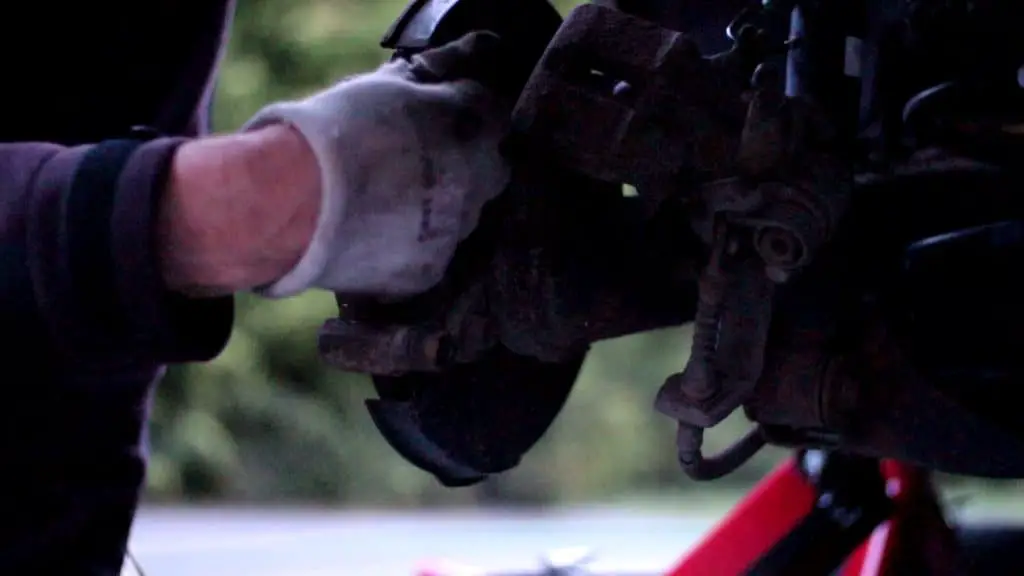
The brake pads are usually between metal clips inside the caliper bracket. To remove the old brake pads simply push them out. The old brake pads sometimes do stick in place and you need to use some force to get them out. You can, for example, use a screwdriver and a hammer to gently knock them out but be careful not to damage the rotor or brake hose.
Brake pads which are stuck to the caliber bracket is one cause of sticking brakes. The brake pads are supposed to slide back when the force from the caliper piston is no longer pressing on the pad.
So if you had to use lots of force to get the old brake pads out most likely the new ones will not slide in gently either. So it’s best to go ahead and use a metal brush to clean off rust and dirt from the caliper bracket. Sometimes I have had to use even a metal file to remove old rust.
5. Install new brake pads
You can put copper anti-seize on the metal contacts of the brake pads (the parts that will be touching the caliper bracket). Be careful not to put any anti-seize on the part of the pad that will be touching the rotor when braking.
Insert the new brake pads into the brake caliper bracket the same way as the old ones where attached.
6. Reinstall the brake caliper

Usually, the brake calipers piston will need to be compressed before it will fit over the new brake pads. The old brake pads were worn and thus the piston is in a different position.
Some brake caliper pistons can be simply compressed with a C-clamp but others need to be rotated or screwed in. If you need to rotate and press the piston at the same time you will need a specialized tool called a caliper compressor.
After compressing the piston you can slide the caliper over the rotor and the brake pads. Line up the the bolt holes and install the bolts back in as they were.
7. Reinstall the wheel
Lift the wheel back into place over the lug bolts. Screw the lug nuts over the lug bolts and tighten slightly. I usually lower the car slightly so that the wheel touches the ground and then tighten the lug nuts to the proper tightness. If you try to tighten the lug nuts when the wheel is off the ground it will spin.
Next, lower the car all the way and you can also put the tools back in place since they are no longer needed.
8. Test the brakes
Last you will need to pump the brake pedal a few times until it becomes hard since the piston will need a few pumps before it touches the brake pads again.
You can start the car and then test the brakes by driving and braking in a safe place.
How to replace Brake Rotors
How long does it take to replace brake rotors? It depends on the car model, but as a rule of thumb, you can expect a mechanic to replace the brake rotors and brake pads in 1-2 hours for one axle. If you are doing it yourself in your driveway you can expect to double this time. In my own experience, I have usually completed this in 2-4 hours. It kind of depends on how tight and rusty some of the parts are.
Required tools for changing brake rotors and pads
Start by purchasing the new brake rotors and pads and get all the tools out:
- New brake rotors and pads for your car model
- Work gloves
- Lug wrench (Telescoping lug wrench is my preference)
- Jack (Floor Jack is my preference)
- Jack stands
- Wheel chock (Piece of wood for example)
- Socket wrench
- Caliber compressor
- Copper anti-seize
- Silicone paste
- Brake cleaner
- Screwdriver
1-4. Removing caliper and brake pads
Follow the steps 1-4 from the above ‘How to change brake pads’ instructions. This will get you to the point where you have lifted the car up, removed the wheel and the brake caliper and pads.
5. Remove the caliper bracket
In some car models the caliper bracket will prevent you from removing the brake rotor so you will need to remove the caliper bracket first. For example in my Honda Jazz I had to first remove the bracket. This can be done by unscrewing the two bolts which are holding the caliber bracket in place.
You can use a regular socket wrench but the caliper bracket bolts might have thread lock on them and require a strong force to remove so having a longer handle helps a lot with the effort.
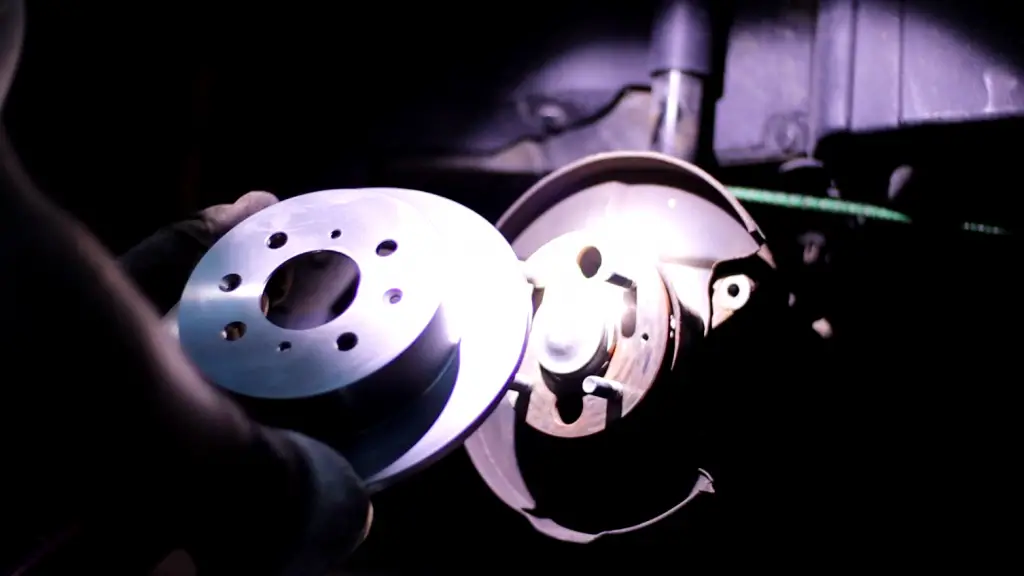
6. Remove the old rotor
If your rotor has screws fixing it to the wheel hub then you will need to remove those first. For example, in my Honda Jazz, I removed those screws already before removing the caliper since it was easier to have the caliper preventing the rotor from turning.
After any screws are off, removing the rotor can be as simple as pulling it off. However, it’s more than likely that the rotor is stuck to the wheel hub due to corrosion and rust. You can hold a piece of wood or for example, a puck against the rotor and then hit that with a hammer to loosen the rotor.
7. Clean the new rotor by removing oil
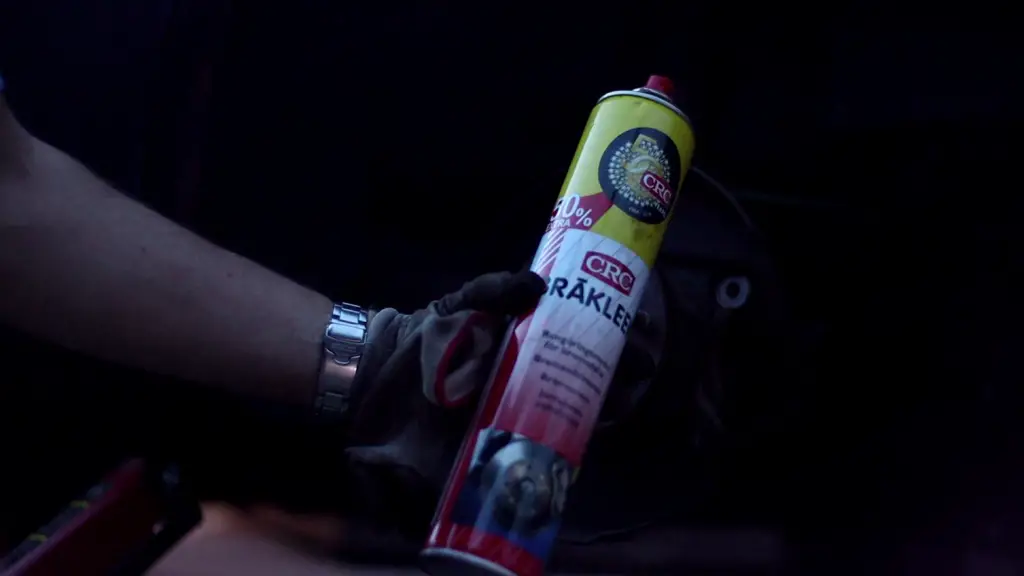
Brake rotors are sold with a coating of storage oil on them so that they don’t rust while in storage. You will need to clean both sides of the rotors removing the storage oil. You can clean the rotors by spraying it with brake cleaner and then use a clean dry cloth to wipe it clean.
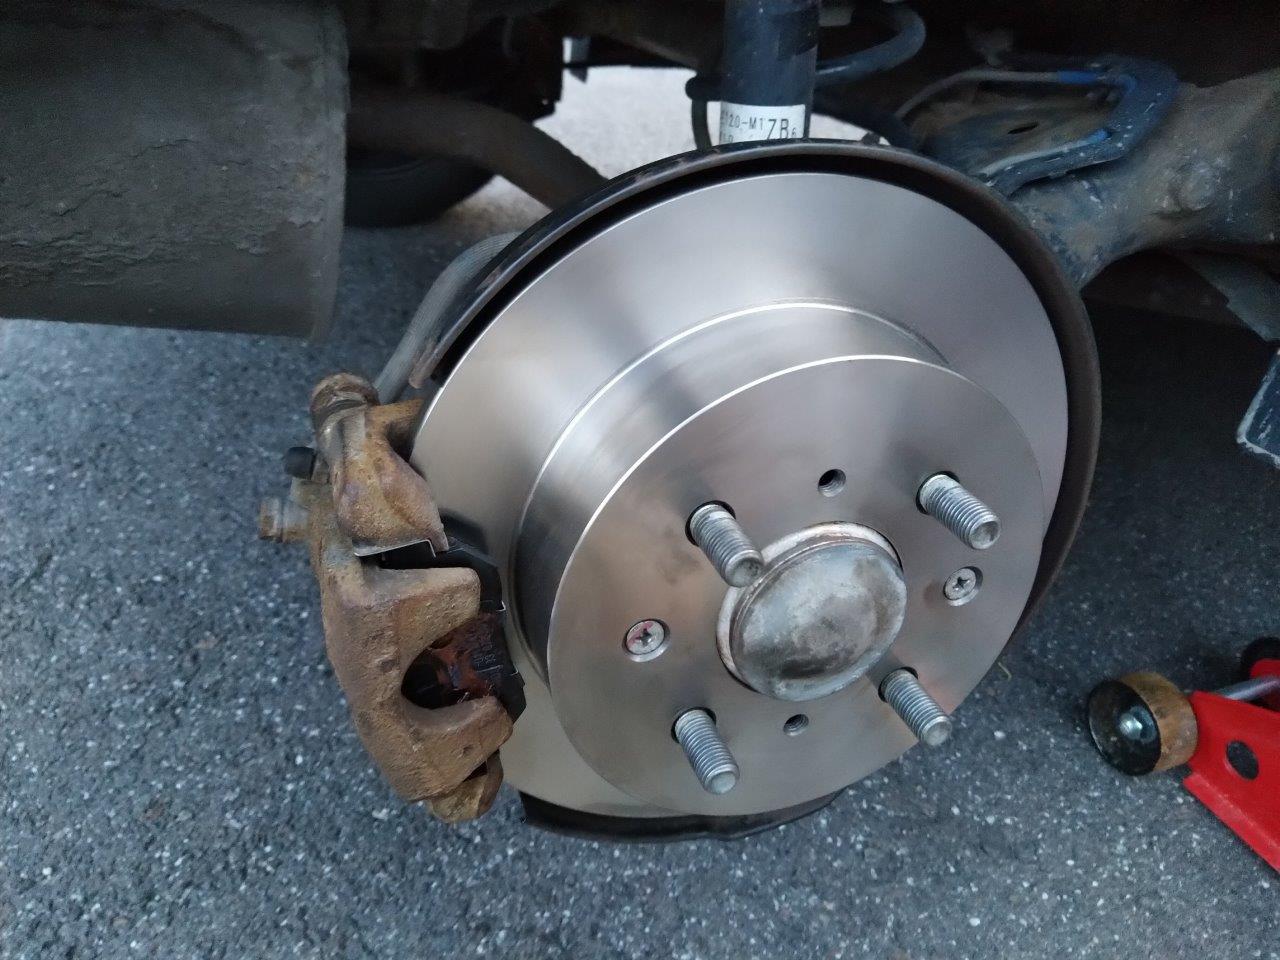
8. Install the new rotor
Install the new rotor disc by placing it over the lug bolts. If the rotor has screw holes make sure to align them with the hubs screw holes.
After placing the rotor in place you can reinstall the screws if your model has screws.
8. Reinstall the brake caliper bracket
If you had to remove the brake caliper bracket now it’s time to reinstall it by aligning it with the bolt holes and then screwing the bolts back in place. You might want to use a torque wrench to torque the bolts down to the correct tightness. For example on the Honda Jazz, I did the brake job for the correct torque was 108 Nm for the caliper bracket bolts.
9. Install brake pads, caliper and the wheel
Follow the steps 5-8 from the above ‘How to change brake pads’ instructions to complete the job. This will get you through installing new brake pads, reinstalling the brake caliper, reinstalling the wheel and testing the brakes at the end.