
If you want to hang some training equipment or heavy objects like a heavy bag, gymnastic rings, suspension training equipment like a TRX, a yoga trapeze or a swing to the ceiling you might be wondering how to mount it to the ceiling so that it is secure.
I was wondering the same thing so I did some research on how to make a secure and safe ceiling installation.
Selecting a ceiling mount or hook
Some of the training equipment previously mentioned like gymnastic rings are not heavy on their own but with an adult having his full body weight on the rings and still moving on them the load on the ceiling mount is quite high.
Eye Bolt
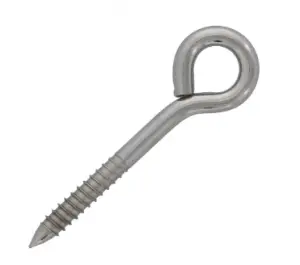
A heavy-duty eye bolt could be one option for mounting some heavy objects. A 1/2 inch shank diameter eyebolt could hold up to 650 lbs or 300 kg of load. You should check the specifications of the bolt you are buying. This mounting option can be quite cheap (only around 3$) but it’s usually not the preferred approach. I might use it for a heavy bag if no one is planning on hanging on it.
Even though I have seen people using eye bolts for mounting gymnastic rings it’s not quite as sturdy as the next option which is the X-mount which I would recommend. Comparing a single eye bolt to an X-mount the X-mount is mounted with 2 bolts and has a steel plate for stability so it’s quite a bit more secure than one eye bolt.
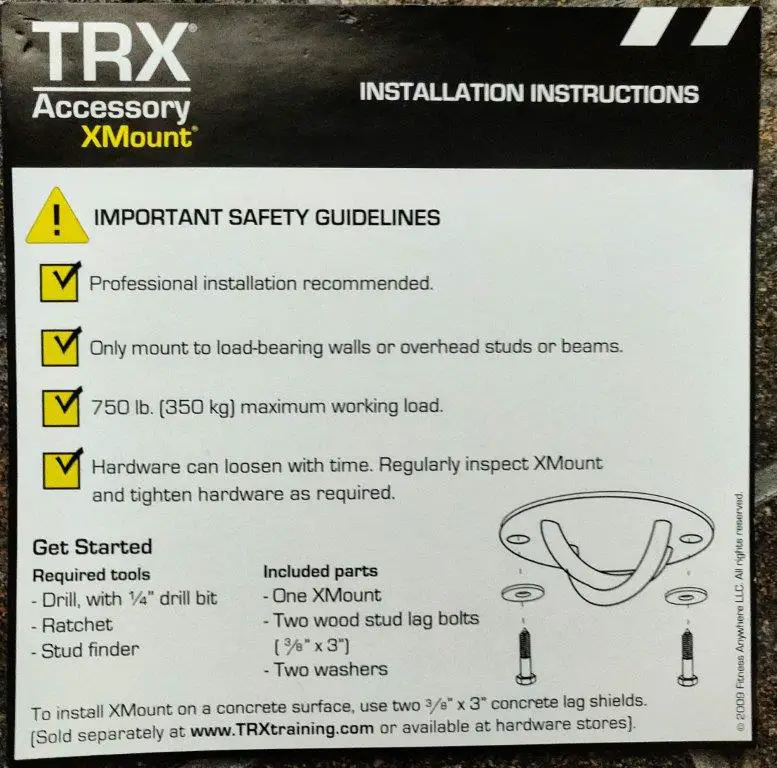
X-Mount ceiling hook
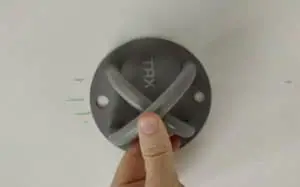
The X shape ceiling anchors are commonly used for hanging suspension training equipment and yoga trapezes and other training equipment. This type of ceiling mount has multiple names, for example, TRX sells a mount called the TRX XMount and YOGABODY calls the mounting system they sell a ceiling hook for the Yoga Trapeze.
The X shape mounts are commonly around 4.5 inches in diameter and come with two 3/8 inch x 3-inch bolts for wood or similar bolts for concrete installation. Typically the mounts state that they can safely support 550 lbs or 250kg.
The prices for these x shape ceiling mounts can range from 16$ to 40$. For the name brands, you obviously pay a premium price but the quality is pretty much the same so I would go with an unbranded option for 16-25$. Note that this price is for one mount which is sufficient for a TRX installation but you do need two mounts for a yoga trapeze or gymnastic rings.
Since this is the type of ceiling mount recommended by name brands for training equipment I feel very comfortable recommending this as a good choice for mounting suspension training equipment to the ceiling.
Swing Hangers
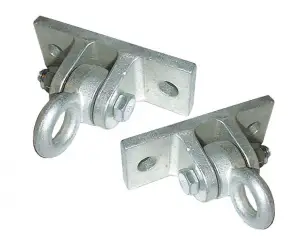
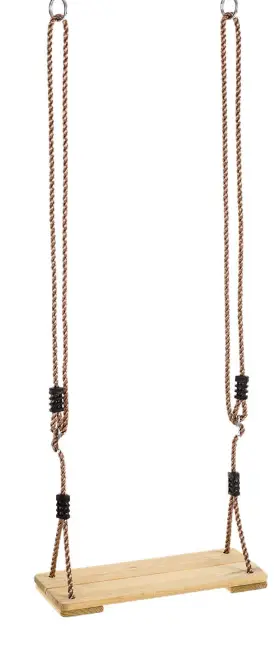
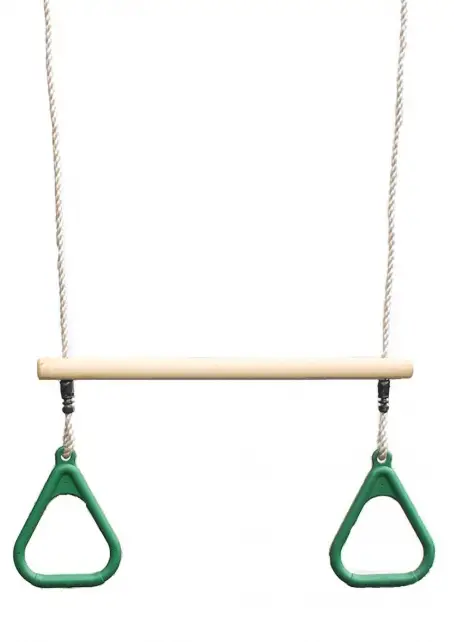
If you are going to install an indoor children’s swing or rings with a bar for your kids then swing hangers might make the most sense since they are designed for the forth and back movement. Some models have bearings and can be quieter.
You need to check the load capacity of the model you select to make sure it’s significantly more than the weight that will be placed on the hangers. Some models can look sturdy but can be specified for example for only 250 lbs or 110 kg.
Also, check the swings maximum weight since some cheaper models have very low weight limits like 100 lbs or 45 kg.
Finding a secure location for ceiling mounting
When hanging a heavy object to the ceiling you need to find a sturdy location. If you live in a house with a wooden frame and drywall in the ceiling then a stud finder will be very useful for finding ceiling joists.
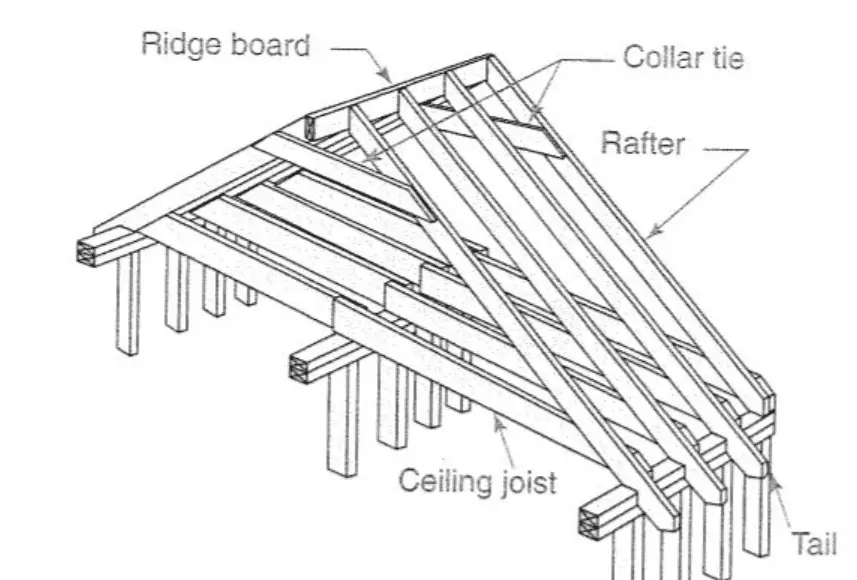
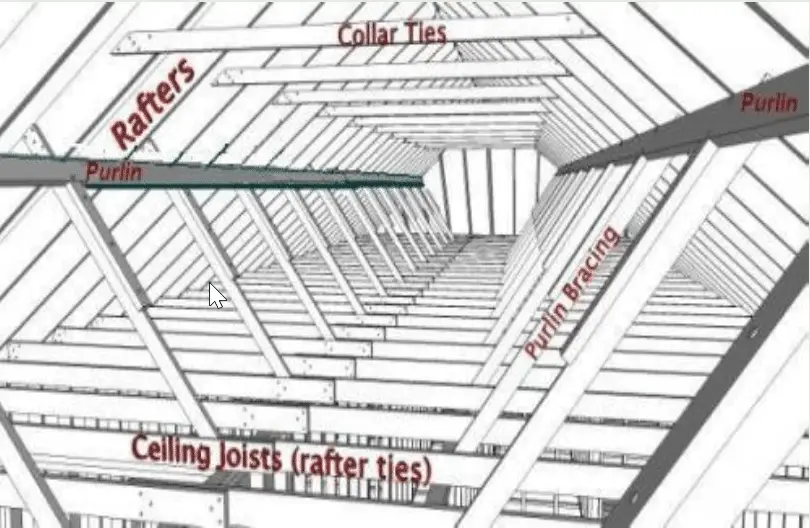
You might have the ceiling drywall installed directly on the ceiling joists (rafter ties) or then you might have a slightly dropped ceiling with another layer of perpendicular ceiling joists under the rafter ties. Our house has a dropped ceiling since we have recessed downlights in the ceiling so this means that we have the second layer of perpendicular ceiling joists. The only easy option is to fix the ceiling mount on a perpendicular ceiling joist.
If you are hanging something really heavy to the ceiling like training equipment which will need to hold an adult’s weight then you should choose the strongest point in the ceiling. If you have the perpendicular ceiling joists then the strongest point is the point where the ceiling joist is exactly under the rafter ties. One way of finding this spot is going outside and looking at the rafter tail and measuring based on that where the rafters are inside. The next thing is to find the ceiling joist with a stud finder and marking it.
How to use a stud finder
In the above video, I show you how to use a stud finder to find a stud in the wall. You can use the stud finder on the ceiling exactly the same way to find a ceiling joist.
Most stud finders work the same way:
- Power on the stud finder
- Set the mode to Stud (if you have multiple modes)
- Push the device on to the wall on a spot which doesn’t have a stud on it
- Press the calibrate button
- Start moving the stud finder horizontally until it beeps
- Mark the edge of the stud
- Move the stud finder from the other side to mark the other edge of the stud
When you have marked the edges of the stud you can measure the center of the stud and that’s where you will need to drill the pilot holes for the screws.
How to find a stud or ceiling joist without a stud finder
If you don’t have a stud finder then you could use a regular magnet or fridge magnet to find a stud or ceiling joist. The drywall is fixed to the ceiling with screws and the magnet will stick to the screws so by finding a screw you will know the ceiling joist is under it.
Installing an X-mount to the ceiling
All the tools you will need for installing an X-mount
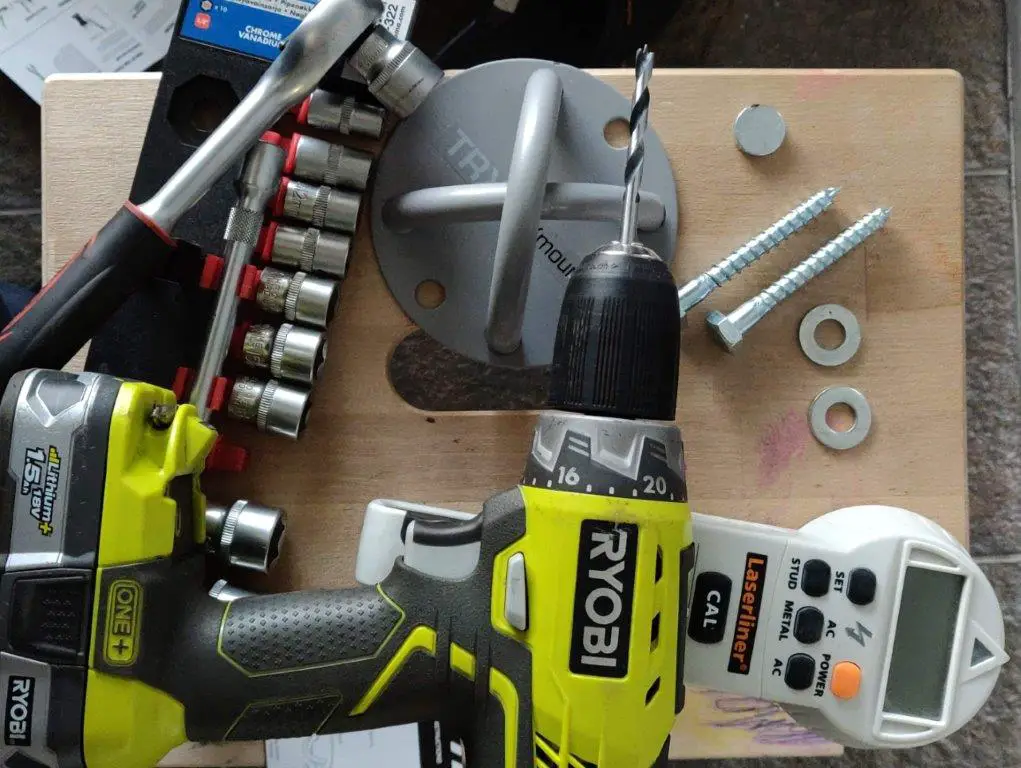
- X-mount and two bolts
- Stud finder
- Pencil
- Cordless Drill
- 1/4″ or 6mm drill bit
- Socket wrench
- magnet (optional)
Placement of the X-mount
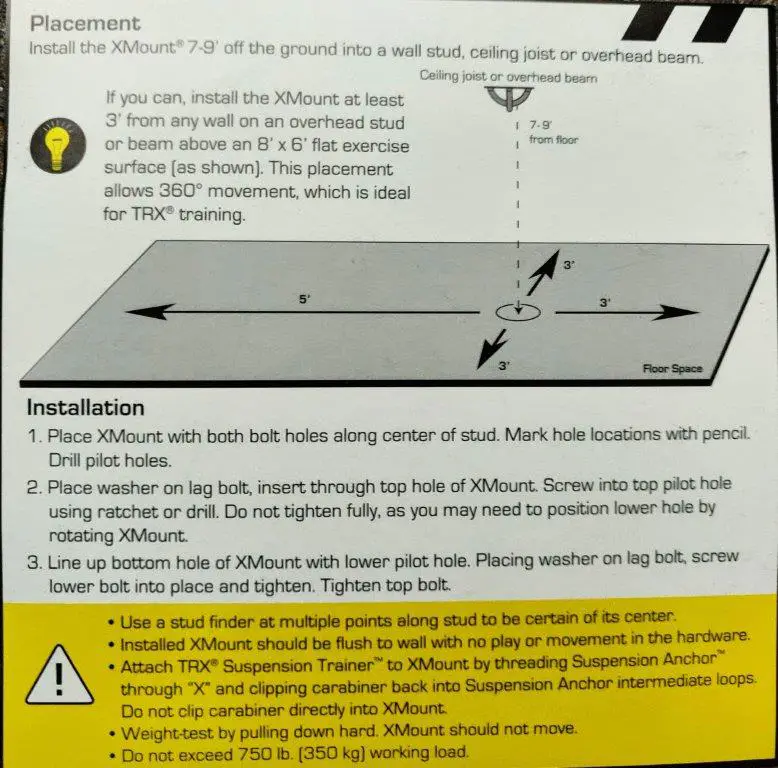
You can install an X-mount on the wall or on the ceiling.
When mounting on the ceiling it should be 7-9 feet (2-2,7meters) off the ground. It should also be 3 feet (1 meter) from any wall. Preferably you should have an 8 x 6 feet wide exercise area.
Once you have found the room and general area where you want to install the X-mount you still need to find the ceiling joist to install it on as described in the previous chapters.
Installing the X-mount
1. Using the stud finder 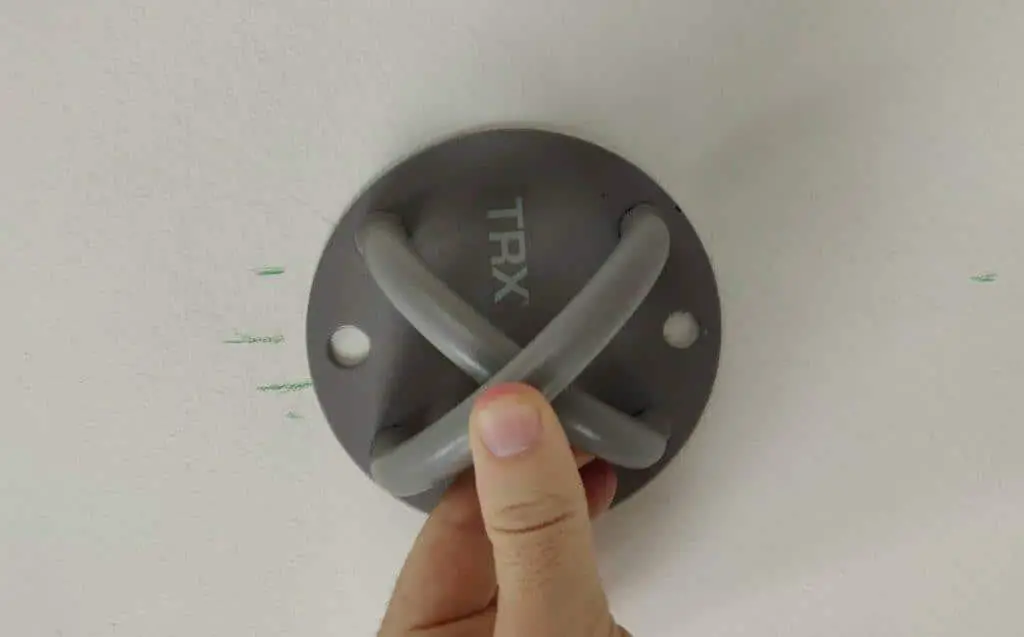
5. Place the X-mount on the line 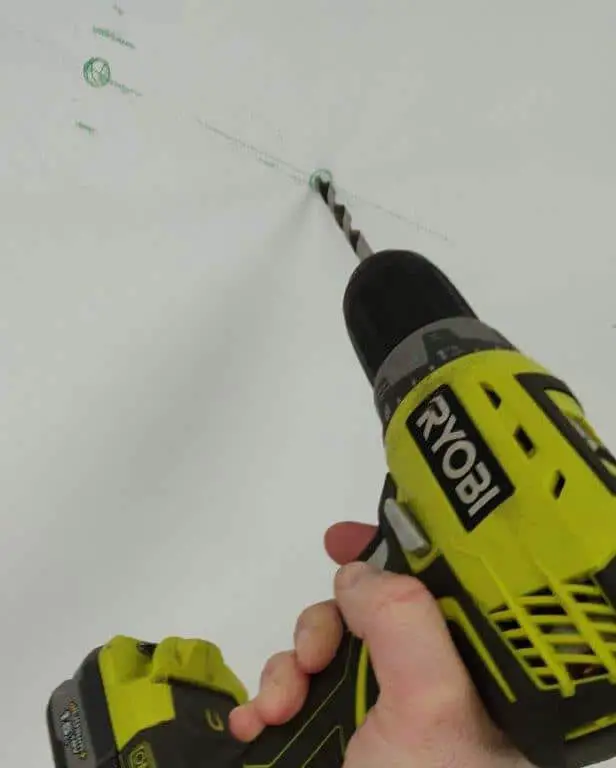
7. Drilling pilot holes 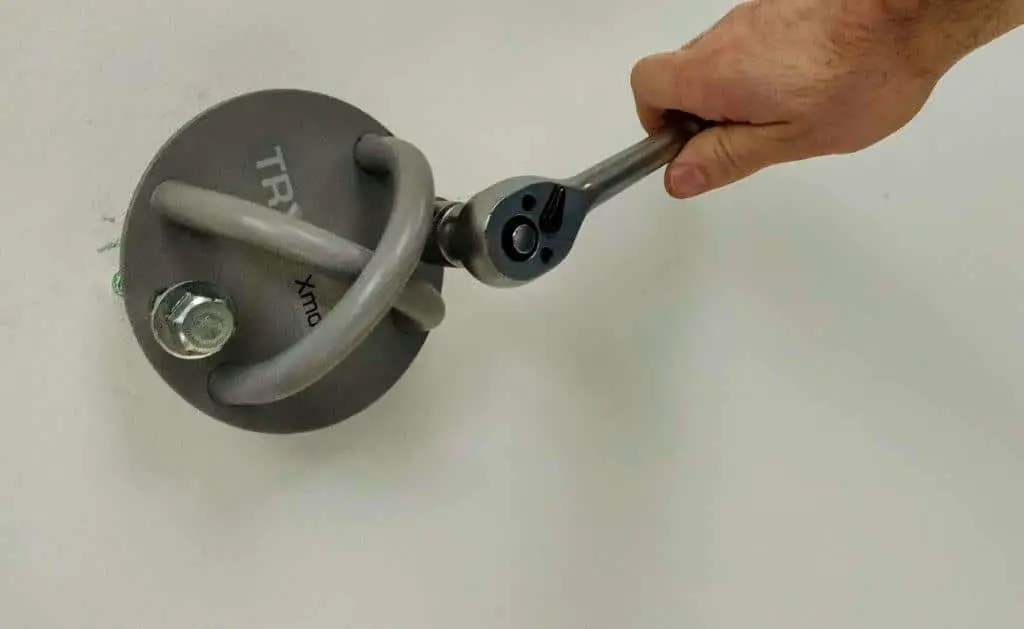
8. Using socket wrench to fix the screws
- Start by using the stud finder to find the ceiling joist you want to fix the X-mount on
- Use the pencil to mark both edges of the ceiling joist
- Measure this on a second location as well and mark the center of the ceiling joist
- Draw a line between the two points
- Place the X-mount holes on the straight line
- Mark the holes with the pencil
- Use the cordless drill with the 6mm drill bit to drill pilot holes. Make sure the pilot holes are as deep as the screws.
- Use the socket wrench to screw the two screws so that they are flush with the surface of the X-mount
Before drilling the pilot holes it makes sense to use a magnet (if you have one) to check that there are no screws on the spot you plan to drill in.
Hanging a TRX suspension trainer
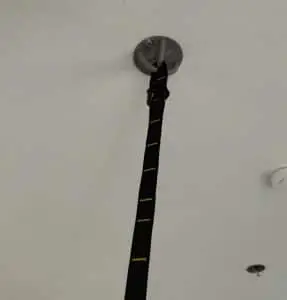
You shouldn’t use a carabiner to clip directly into the X-mount. Instead, the proper way of hanging the TRX suspension trainer to the X-mount is to push the Suspension Anchor through the X-mount and clipping the carabiner into the Suspension Anchor into one of the intermediate loops as shown in the above picture.
Next, you can hang the TRX suspension trainer into the Suspension Achor.
Before starting to train, do a proper weight test by pulling down hard on the TRX. The X-mount should not move when you pull down on it.