
The two most common causes for a toilet leaking into the bowl are a worn-out flapper and the other one is the fill valve which might not be stopping to fill.
A toilet that keeps running after you flush it is really annoying. Mine has done it for a while and it usually stops if I tap the toilet a bit but that’s not really a fix it’s just a temporary solution. Luckily this is a perfect DIY project that you can fix yourself without too many tools.
Diagnosing the problem
Why is the toilet running and water is leaking into the toilet bowl? It’s quite easy to figure out is the problem with the flapper or the fill valve. If you close the water intake and the toilet still keeps running then you know it’s the flapper leaking and not the fill valve overfilling the tank.
If the fill valve makes an annoying loud whistling noise when filling up then it’s best to go ahead and replace the fill valve.
Fixing the problem
In the below chapters I go through three possible fixes depending on which issue is causing your toilet to leak into the bowl.
Replacing the fill valve
I had the issue that when I flush the toilet the water was overflowing via the overflow tube into the toilet bowl because the fill valve didn’t stop filling.
You can first try to flush debris from the fill valve as described in a chapter further down below. In my case, this didn’t help so the way to go was replacing the fill valve.
In the above video, I show you the steps to diagnose the problem and how to remove the old fill valve and install a new one.
By doing the repair yourself you will likely save around 50 to 150 $. A plumber or handyman will either charge an hourly rate or a flat fee based on the job required.
Steps for installing a Fluidmaster fill valve
I bought the Fluidmaster PRO45B fill valve because it a brass metal shank and therefore should last longer. The other Fluidmaster models like the 400 series models look pretty much the same and have the same installation steps.
Most of the steps are simple and the only tool I needed was a wrench.
1. Remove the lid from the tank
The toilet cistern or water tank has a lid on it. There are different methods to remove it depending on the model. Usually, the button to flush or the handle to flush can be removed and then the lid can simply be lifted off. My model has a button for flushing and that button can be rotated to screw it off.
2. Turn off the water supply to the toilet
Most toilets have a mechanism to close the water supply to the toilet cistern in the form of a valve that is installed into the pipework. Usually, the valve will have a knob you can turn by 90 degrees to close it or it might be a valve you turn with a screwdriver.
3. Disconnect the pipework / water supply
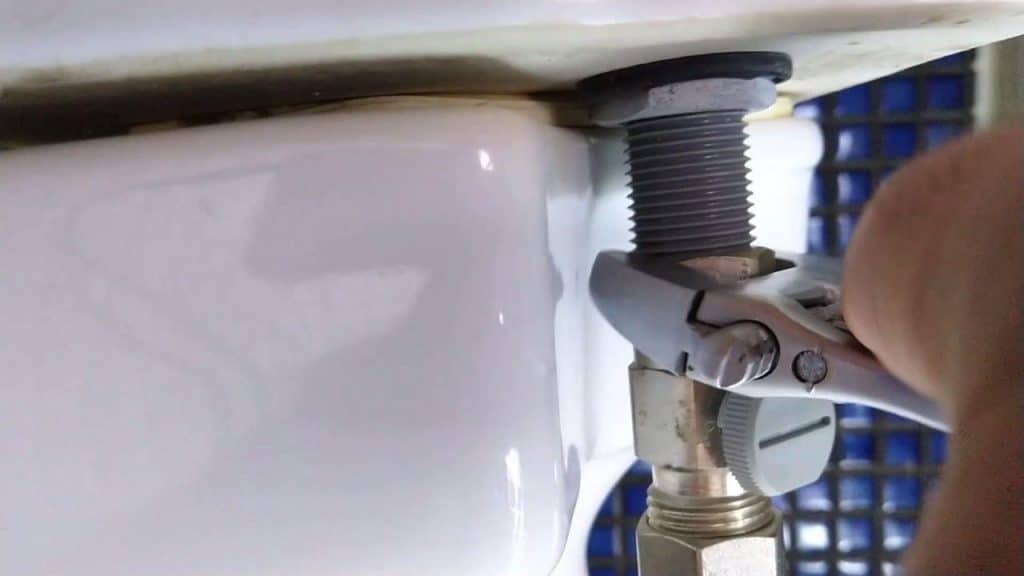
Before removing the pipework it makes sense to flush the toilet as empty as possible to avoid water flowing to the floor from the cistern.
In order to disconnect the pipework from the Fluidmaster shank, you can use a wrench to loosen the nut and then unscrew it by hand. When removing the pipework you will get some water coming out so you can place a bucket underneath and perhaps have a towel ready for drying.
4. Remove the old fill valve from the toilet tank (cistern)
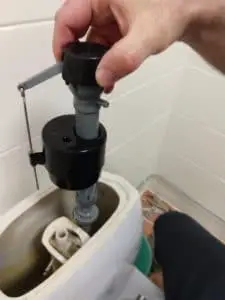
You will need to unscrew the nut on the fill valve shank by first loosening it with a wrench and then taking it off by hand. After that, you can remove the old fill valve simply by pulling it out of the cistern.
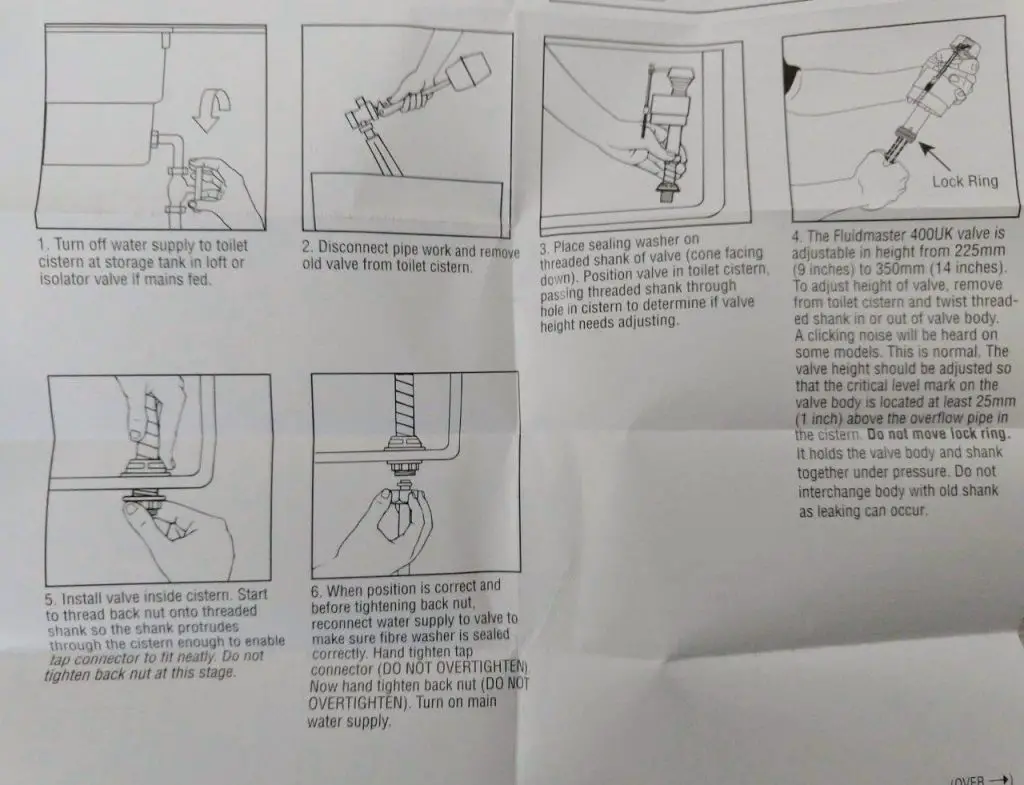
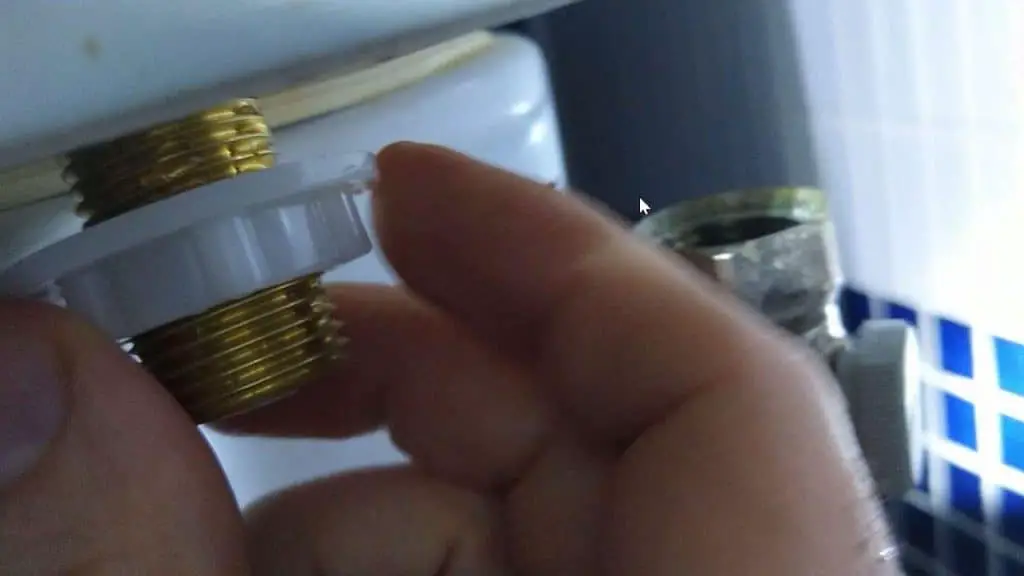
5. Place the sealing washer on the threaded shank
On the new fill valve you will need to insert the sealing washer on the threaded shank since that is what will keep the water from leaking out of the cistern on to the floor.
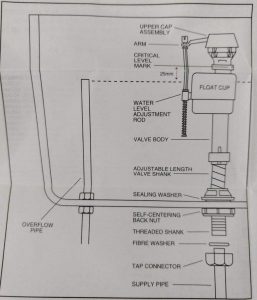
6. Adjust the height of the Fluidmaster valve to match the old one
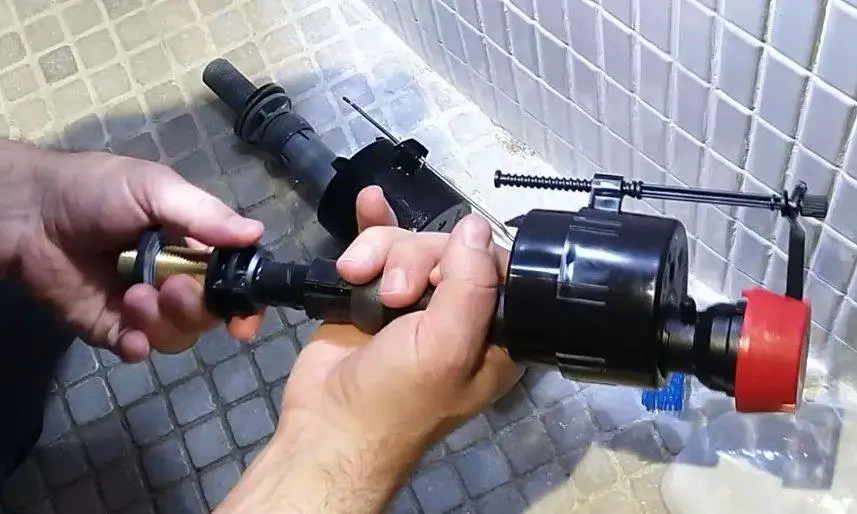
You will need to adjust the new fill valve height to match the old fill valve so that it will operate correctly. In order to adjust the height you will need to push the lock ring first up and then twist and pull the shank to make it longer or twist and push to make it shorter. Once you have the correct height pull the lock ring back into place.
7. Install the new Fluidmaster valve inside the tank
Installing the new Fluidmaster fill valve into the toilet cistern is easy since you only need to lower it down and make sure the shank comes out of the hole at the bottom and the fill valve is oriented into a position where it will be straight.
8. Place the nut on the threaded shank
Once you have the fill valve in place you will need to hand tighten the nut on to the threaded shank. Don’t fully tighten the nut at this stage to allow for some wiggle room when connecting the pipes.
9. Reconnect water supply and tighten the nut

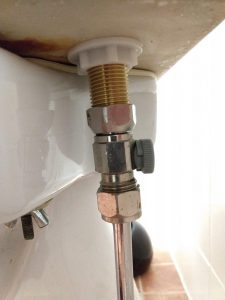
Reconnecting the pipework is as easy as it was removing it. Just align the tab connector onto the threaded shank and first hand tighten the nut and then tighten it with a wrench.
Once the pipes are connected remember to tighten the plastic nut also so that the water from the cistern will not leak on the floor.
10. Turn on the water supply to the toilet
Start by using a dry cloth or some toilet paper to wipe the pipework making sure everything is dry.
Now it’s time to turn the water supply back on by turning the valve on the water supply. The toilet cistern will start to fill up. At this point, you can watch for any leaks. If something is leaking you know you will need to tighten the nut on the connection a bit more.
11. To complete the installation clear debris from the waterline.
See the video at the end of the article on how to do this.
Where to buy the fill valve
My toilet has a Fluidmaster 400 fill valve. I live in Finland and the price for one of those is 69,90€ in a local Bauhaus store. I think that’s crazy expensive. Luckily Amazon.de ships to Finland and the price is less than a third. Amazon.de even has free shipping to Finland if you order over a certain limit. If you are in the US the price is much lower and can be even under 10 $. For the current pricing check the links below.
Replacing the flapper
The second most common reason for a running toilet is the flapper wearing out. Often the flapper becomes worn out due to mineral deposits since it’s submerged in water.
The below video discusses diagnosing an issue with the flapper. Replacing a flapper is fairly easy and a universal flapper will only cost around 5$.
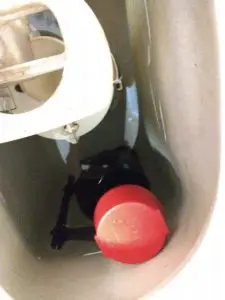
Flushing debris from a Fluidmaster fill valvle

If the fill valve is not stopping to fill the tank, fixing it might be as easy as cleaning the fill valve seal as shown in the below video flushing it with water.
The above diagram explains how to flush debris from the Fluidmaster fill valve.
- To open the cap assembly you need to first lift the arm up and then rotate the cap anti-clockwise.
- Next, you put a container or cup over the top of the fill valve and let the water run for 30 seconds clearing any debris.
- Reassemble by placing the cap back on and rotating clockwise.