You most likely tried searching for the official Philips Hue Outdoor Motion Sensor Manual PDF but were not able to find it. This is not the official manual, but you can find here all the relevant information in an easier format than the manual would have provided. It seems currently Philips doesn’t provide the manual PDF on their web page and the product itself comes only with a small leaflet that doesn’t really cover all topics.
Note that this product is intended to be used with the Philips Hue Bridge to control lights. However, it is a ZigBee device and is known to function with other ZigBee Hubs. For example, I use it with the Samsung Smartthings Hub.
If you are looking to buy the sensor you can check the price from Amazon:
Specifications
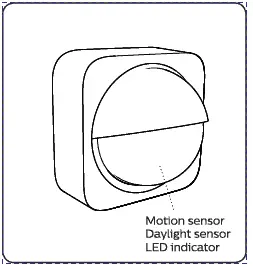
The Philips Hue outdoor motion sensor has several sensors in it. There is a motion sensor, temperature sensor, and illumination sensor.
- IP rating: IP54 (Weatherproof, not to be submerged in water)
- Battery lifetime: 2 years (Battery powered Wireless installation)
- Battery type: 2 x AA alkaline (You could also use AA Li-ion batteries)
- Sensor depth: 56 mm
- Sensor height: 76 mm
- Sensor width: 76 mm
- Wireless RF frequency band: 2400 – 2483.5 MHz
- Wireless protocol: IEEE 802.15.4
- Channels 11-26
- Operating temperature: -4 to 131 degrees Fahrenheit (-20 to 55 degrees Celcius)
- Motion sensing may be reduced at temperatures above 86 F
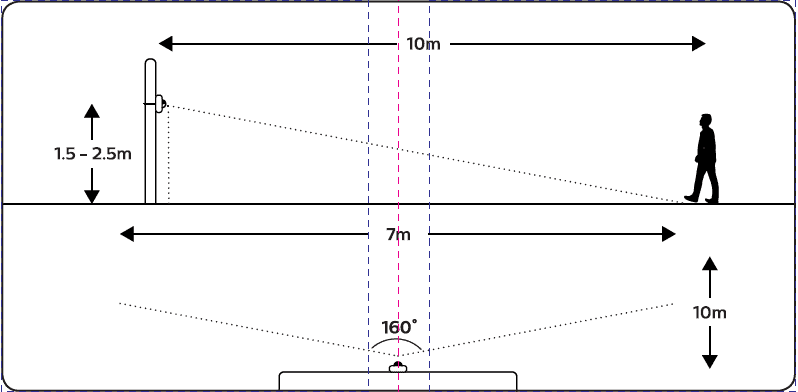
- Motion sensing horizontal angle: 160 degrees
- Motion sensing vertical angle: 80 degrees
- Motion sensor range: 12 meters
Mounting
You can follow the video above where I show the different mounting options or read about them below.
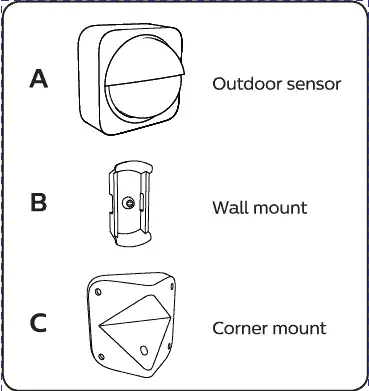
You don’t need an electrician to mount the device since it’s wireless and has the batteries pre-installed. You can install it anywhere you like: on a wall, a corner or for example a pole.
The package comes with a wall mount, a corner mount and two wood screws for mounting.
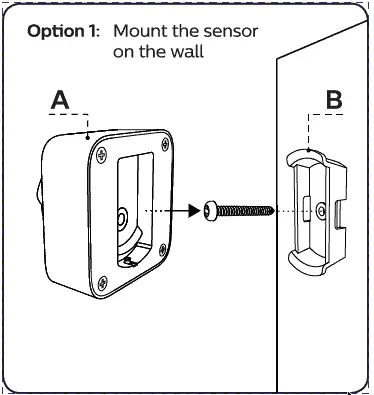
Option 1: Mounting on a wall
By using the wall mount, part B, and one screw you can easily mount the device on a wooden surface like a wall.


Option 2A: Mounting on inside corner
By using the corner mount, part C rotated correctly you can mount the device on an insider corner with two screws and then install the wall mount part B with a small screw to the corner mount. Lastly, install the sensor on the wall mount.
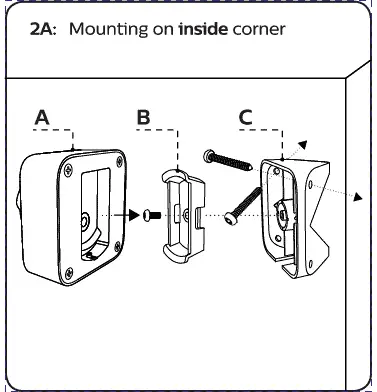
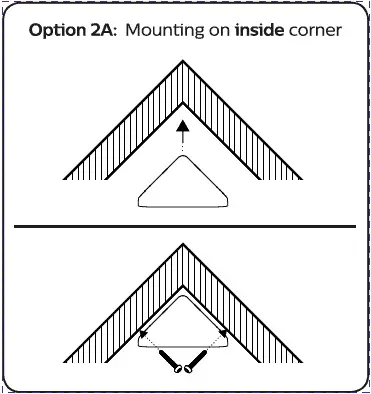
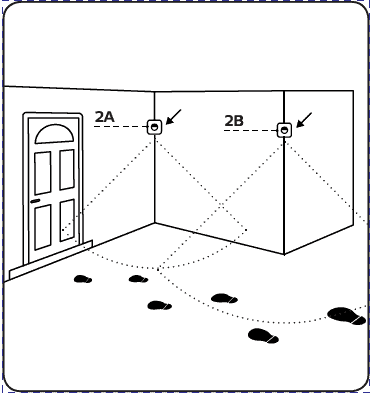
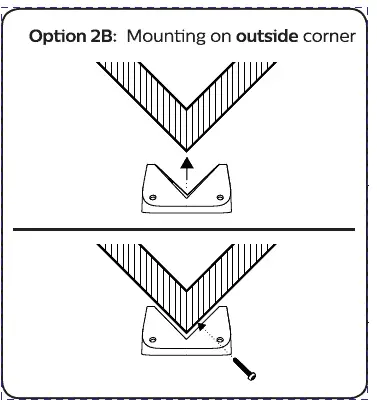
Option 2B: Mounting on outside corner
By using the corner mount, part C rotated correctly you can mount the device on an outside corner with one screw. Next, install the wall mount part B with a small screw to the corner mount. Lastly, install the sensor on the wall mount.
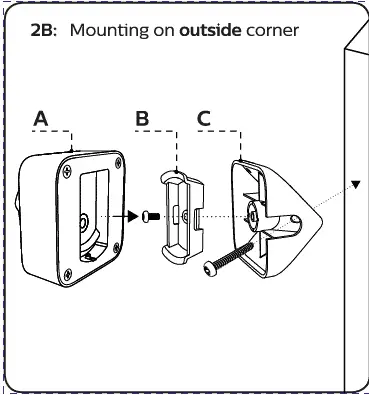

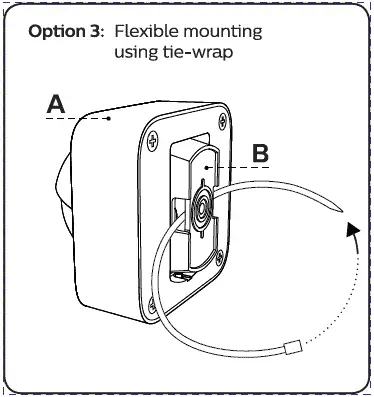
Option 3: Flexible mounting using a zip tie
By using the wall mount, part B, and a zip tie you can mount the device on different surfaces like a pole or gutter, etc.
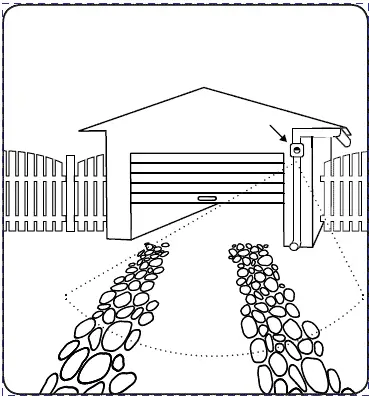
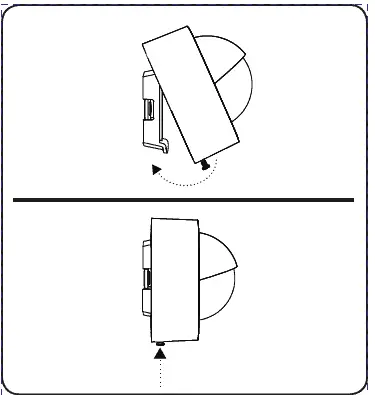
Note that in all steps you finalize the installation by tightening the screw on the bottom of the Hue Outdoor sensor.
Philips Hue Outdoor Motion Sensor range
In the above video I do a test of the range, you can either watch it or read about it below.
On the box it says the range is 12 meters for detecting motion.
The vertical angle for sending motion is 80 degrees tilting slightly down so the higher you place the motion sensor the more range you will have.
I did a test and when mounting the sensor at 1.5 meters from the ground the range was only around 3 meters. When I mounted the sensors around 3 meters off the ground the distance was around 7 to 8 meters. The horizontal angle was very good and it did catch motion from the sides as expected.
Philips Hue Outdoor Motion Sensor Setup
Note that this product is intended to be used with the Philips Hue Bridge to control lights. However, it is a ZigBee device and is known to function with other ZigBee Hubs. For example, I use it with the Samsung Smartthings Hub.
Setup on the Philips Hue Bridge
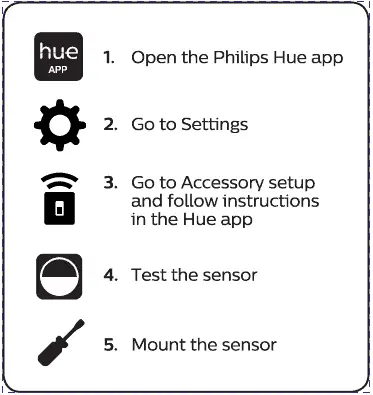
Setting up the device with the Philips Hue Bridge should be as simple as following the steps on the above image.
Philips Hue Outdoor Motion Sensor Setup on the Samsung Smartthings Hub
I use the Philips Hue Outdoor Motion Sensor with the Samsung Smartthings Hub. Unfortunately, setup doesn’t work out of the box yet. Instead, you need to do a few manual steps first. Note that this approach doesn’t require the Hue Bridge.
- Add a community made custom device handler into your Smartthings Hub
- Press the Setup button on the backside of the Hue Sensor for around 15 sec
- Go to your Smartthings app under ‘Add a thing’
- The device should appear
There are many guides on adding custom device handlers but here are the basics for adding this one.
- Go to https://account.smartthings.com
- Go to the tab: My device handlers
- Press on ‘Create New Device Handler’
- Use the tab From Code
- Copy paste the code from bogdanalex90’s Github hueMotionSensor
- Change the model on row 29 to SML002. This needs to be done because the github code is actually for the indoor motion sensor but works for the outdoor one if you change the model
- Press Create
If you have any questions please leave a comment and I will try to get back to you.
Philips Hue Outdoor Motion Sensor on Apple HomeKit
You can connect the Philips Hue Outdoor Motion Sensor to HomeKit via the Hue Bridge.
Steps for connecting Hue to Apple HomeKit:
- Open the Philips Hue app on your iPhone and navigate to Settings > HomeKit and Siri.
- Follow the on-screen prompts to create a new Home
- Apple HomeKit automatically opens your camera so you can scan the HomeKit code found on the bottom of your Philips Hue Bridge.
- After pairing your HomeKit to your Bridge, you can use the motion sensor in HomeKit
Philips Hue Outdoor Motion Sensor on Google Home
You can connect Philips Hue lights to Google Home via the Hue Bridge. I’m not sure can you do anything with the Hue Motion Sensor in Google Home since it’s not really a voice controllable device.
Steps for connecting Hue to Google Home:
- Open the Google Home app and navigate to the Home Control section in the menu.
- Press the plus icon to add a device
- scroll to search for Philips Hue
- Log in with your My Hue account to automatically search for your Rooms.
- Follow the on-screen instructions to assign your Google Assistant to your preferred Rooms.
- After successful setup, you can use Hue devices in Google Home
Philips Hue Outdoor Motion Sensor on Alexa
You can connect the Philips Hue Outdoor Motion Sensor to Alexa via the Hue Bridge (also via the Smartthings Hub if you like).
Steps for connecting Hue to Alexa:
- Enable the Hue skill in your Alexa app
- Once the device is connected, ask Alexa to “discover devices” or
- select “discover” in the Alexa app. This will display all your lights, rooms, and scenes.
Philips Hue Outdoor Motion Sensor Battery Replacement
Unfortunately, the official manual that comes with the product is only a small leaflet and doesn’t cover battery replacement at all. I figured it out and recorded the below video on how to do it. The batteries should last 2 years so you don’t need to worry about this immediately.
If you want to rather read the steps for replacing the batteries here they are:
- Remove the sensor from the wall by loosening the bottom screw
- On the backside loosen the four screws
- Pull on the four screws to remove the back cover
- Replace the old batteries with wither new AA alkaline or AA Lithium batteries
- Reinstall the back cover and mount again on wall mount


